Install the plugin into Backstage.
cd packages/app
yarn add @roadiehq/backstage-plugin-argo-cd
Add proxy config to the app-config.yaml file
proxy:
  '/argocd/api':
    target: https://<your-argocd-instance>/api/v1/
    changeOrigin: true
    # only if your argocd api has self-signed cert
    secure: false
    headers:
      Cookie:
        $env: ARGOCD_AUTH_TOKEN
Add argoCD widget to your overview page
// packages/app/src/components/catalog/EntityPage.tsx
import {
  EntityArgoCDOverviewCard,
  isArgocdAvailable
} from '@roadiehq/backstage-plugin-argo-cd';

const overviewContent = (
  <Grid container spacing={3} alignItems="stretch">
  ...
    <EntitySwitch>
      <EntitySwitch.Case if={e => Boolean(isArgocdAvailable(e))}>
        <Grid item sm={4}>
          <EntityArgoCDOverviewCard />
        </Grid>
      </EntitySwitch.Case>
    </EntitySwitch>
  ...
  </Grid>
);
Add annotation to the yaml config file of a component
metadata:
  annotations:
    argocd/app-name: <your-app-name>
Get and provide ARGOCD_AUTH_TOKEN as env variable in following format
ARGOCD_AUTH_TOKEN='argocd.token=<token>'Found a mistake? Update these instructions.
Don't want to spend your time installing and manually upgrading each Backstage plugin?
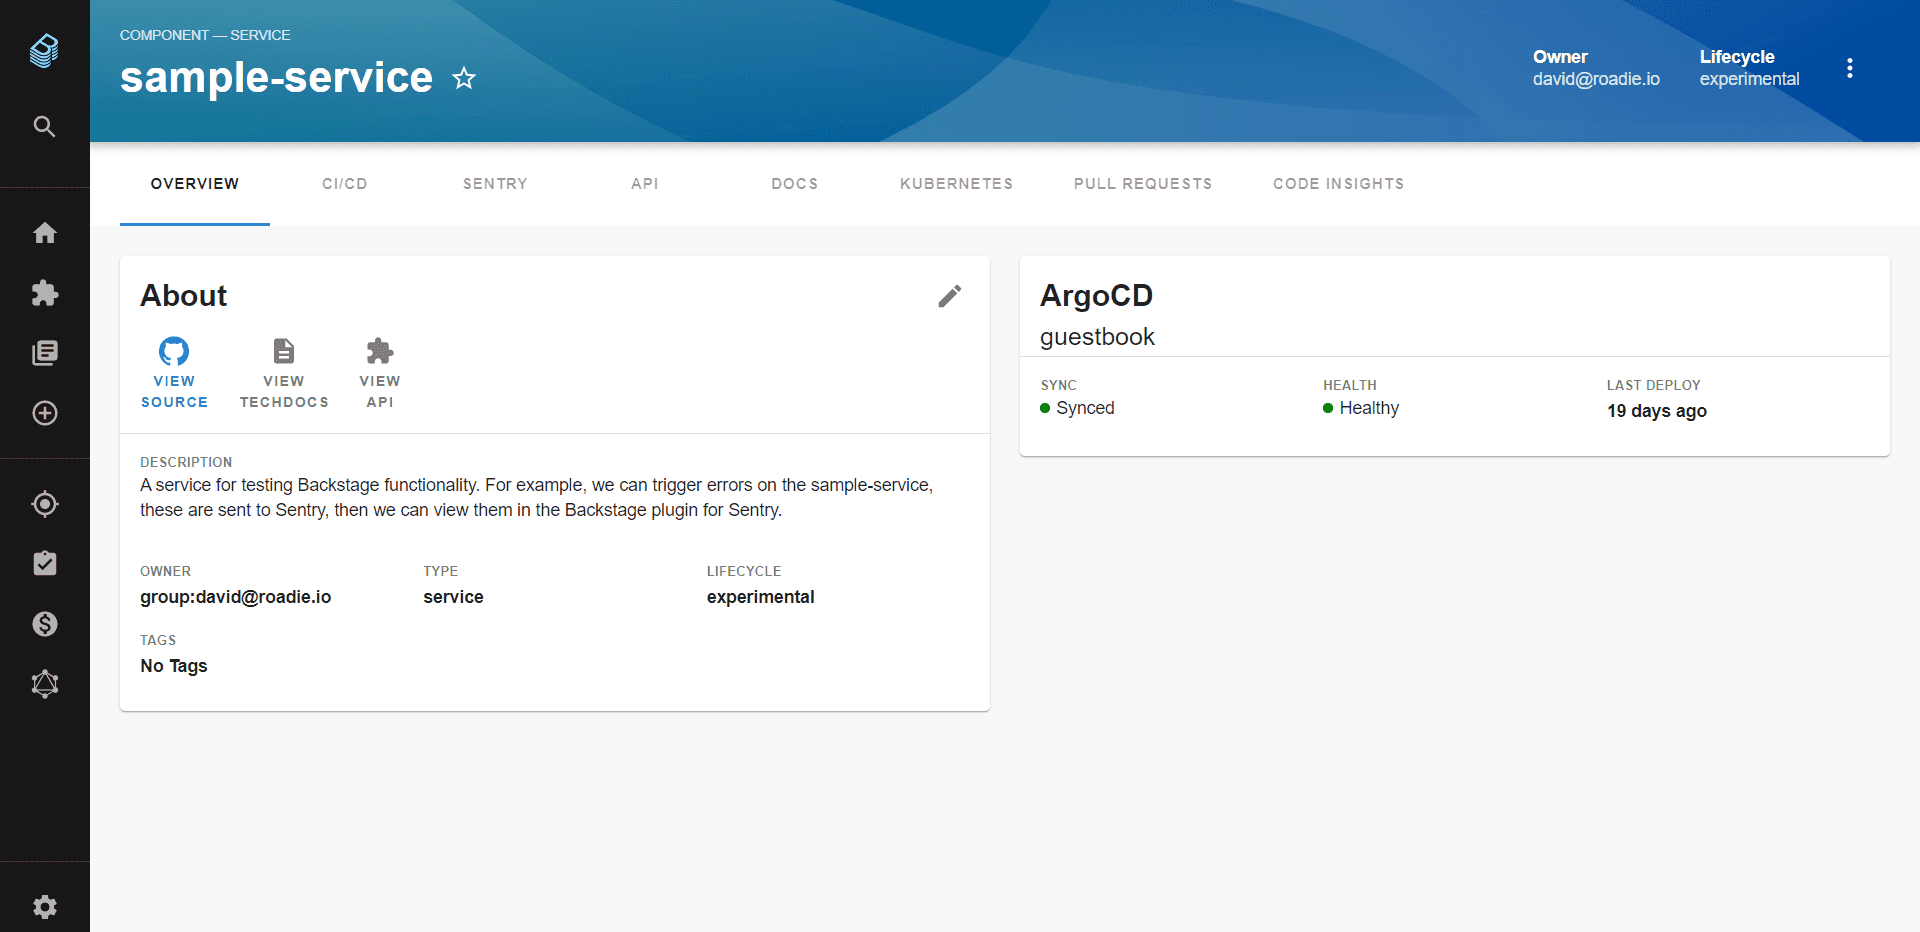
How it looks

Things to know
Support for multiple ArgoCD instances - Option 1
If you want to create multiple components that fetch data from different argoCD instances, you have to add a proxy config for each instance:
proxy:
...

  '/argocd/api':
    target: https://<someAddress>/api/v1/
    changeOrigin: true
    secure: false
    headers:
      Cookie:
        $env: ARGOCD_AUTH_TOKEN

  '/argocd/api2':
    target: https://<otherAddress>/api/v1/
    changeOrigin: true
    secure: false
    headers:
      Cookie:
        $env: ARGOCD_AUTH_TOKEN2
Add all required auth tokens to environmental variables, in this example, ARGOCD_AUTH_TOKEN2.
And then in the following component definition annotations add a line with the url to the desired proxy path:
argocd/proxy-url: '/argocd/api2'argocd/proxy-url annotation defaults to ‘/argocd/api’ so it’s not needed if there is only one proxy config.
Support for multiple Argo CD instances - Option 2 - Argo CD backend plugin
To enable ArgoCD backend plugin you need to import it to your backend application.
- Create plugin file for ArgoCD backend in your
packages/backend/src/plugins/directory.
// packages/backend/src/plugins/argocd.ts

import { createRouter } from '@roadiehq/backstage-plugin-argo-cd-backend';
import { PluginEnvironment } from '../types';

export default async function createPlugin({
  logger,
  config,
}: PluginEnvironment) {
  return await createRouter({ logger, config });
}- Modify your backend router to expose the APIs for ArgoCD backend
// packages/backend/src/index.ts

import argocd from './plugins/argocd';
...

const argocdEnv = useHotMemoize(module, () => createEnv('argocd'));
...
apiRouter.use('/argocd', await argocd(argocdEnv));
If you want to create multiple components that fetch data from different argoCD instances, you can dynamically set the ArgoCD instance url by adding the following to your app-config.yaml files.
argocd:
  username: ${ARGOCD_USERNAME}
  password: ${ARGOCD_PASSWORD}
  appLocatorMethods:
    - type: 'config'
      instances:
        - name: argoInstance1
          url: https://argoInstance1.com
          token: ${ARGOCD_AUTH_TOKEN}
        - name: argoInstance2
          url: https://argoInstance2.com
The Argo plugin will fetch the Argo CD instances an app is deployed to and use the backstage-plugin-argo-cd-backend plugin to reach out to each Argo instance based on the mapping mentioned below.
Add the required auth tokens to environmental variables, ARGOCD_USERNAME and ARGOCD_PASSWORD.
You can also use an argo session token as mentioned above in the argocd object as shown above. If omitted, we will use the argo username and password from the code block above.
Become a Backstage expert
To get the latest news, deep dives into Backstage features, and a roundup of recent open-source action, sign up for Roadie's Backstage Weekly. See recent editions.
